
|
|
Tech Note #3: Multimic room analysis with SpectraFooBy Allen RowandRevision 1.2 - July 2, 2010 (original publication: June 14, 2007)IntroductionThis tutorial will show you how to use SpectraFoo as a combined analyzer to allow you to instantly and effortlessly take a transfer function of multiple locations in a room. Here's what you need:
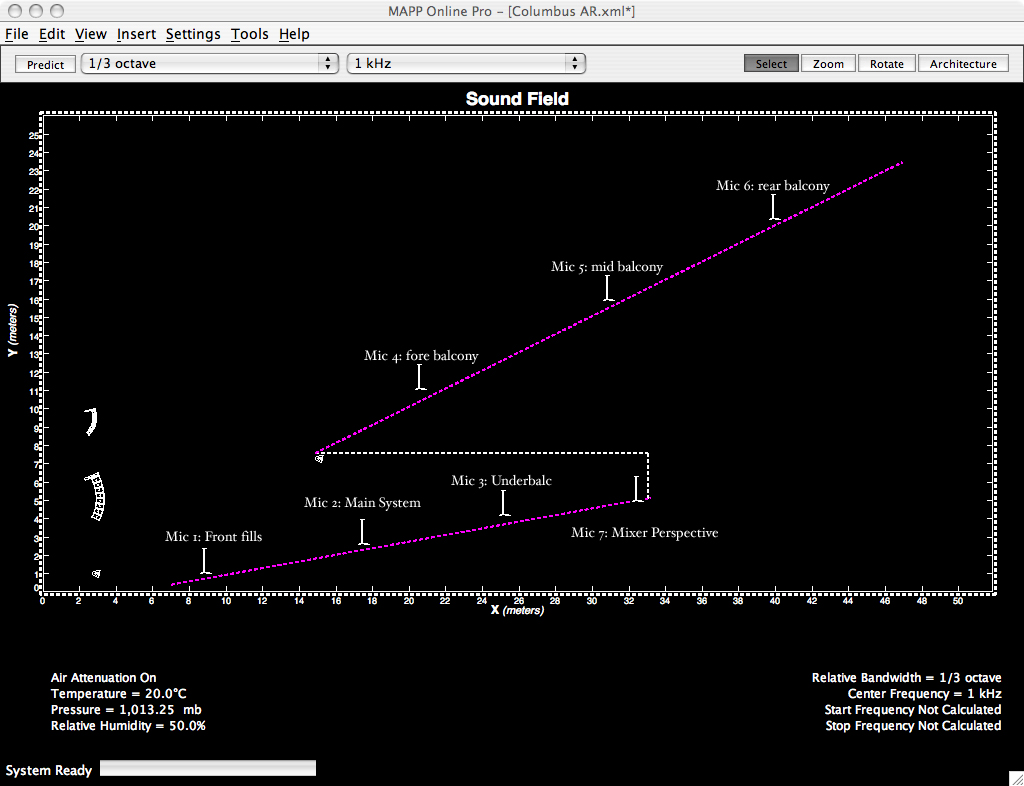
Why do this?In a live situation, you need to measure a reinforcement system in many different locations. By using this technique you can quickly see how changes in one area influence another, while you can stay near the processing gear. This functionality has previously only been available using specialized equipment costing tens of thousands of dollars. Now it's yours at a fraction of the cost, plus the same equipment can be used for playback, recording, etc. Example Multizone ConfigurationHere’s an example of how I placed the microphones to measure my sound system in a venue (the Ohio Theatre in Columbus, OH). This allowed me to measure the front fills, main arrays and underbalcony speakers separately on the orchestra level, and also to see their interaction. I was also able to look at how the room’s natural reinforcement interacted with the PA in the balcony and adjust for sound falloff.
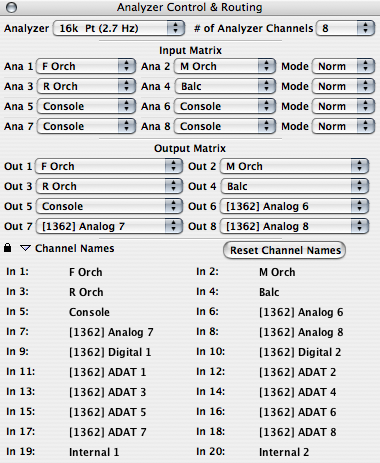
First step: Set up MIOConsoleFor the sake of this tutorial, I'm going to set up four microphones; three in the orchestra (or stalls) level of a venue, and one in the balcony. 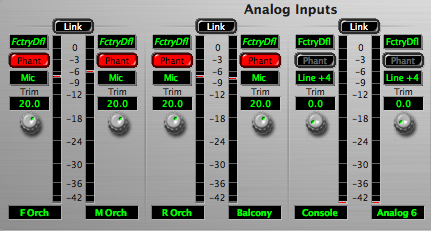 I've named the inputs for the front, mid and rear orchestra, balcony and console. My microphones are condensers, so phantom power is on. I've dialed the gain to a good starting level for the mics, and now we're ready to set up 'Foo. Next step: Set up the routing in SpectraFooThe first things to do is set the number of analyzer channels; it has to be at least double the number of microphones.
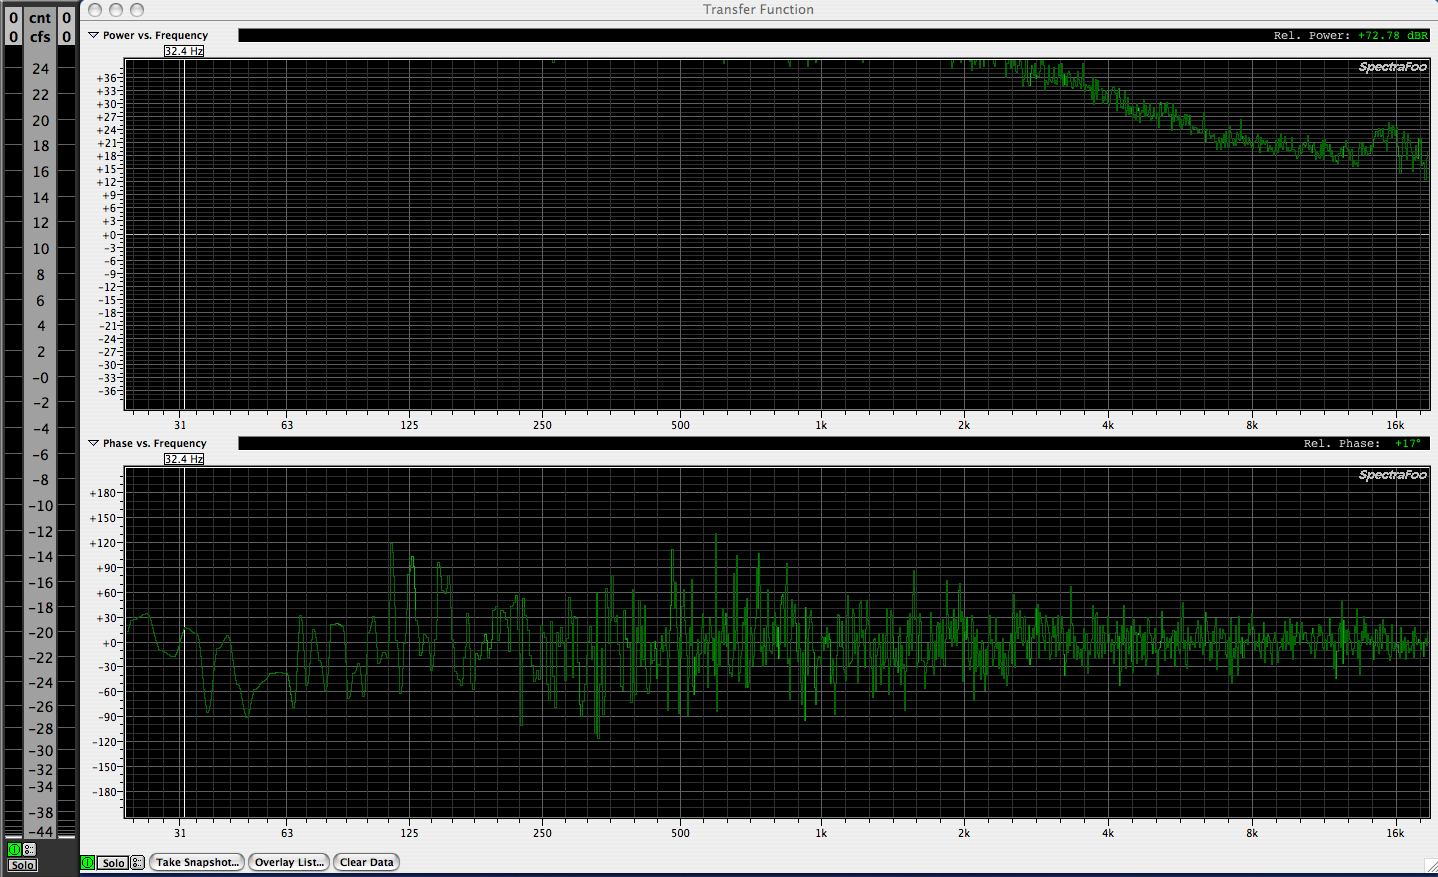
When you are working with a transfer function, you have to time align the source and response signal. This is done by delaying the source so that it lines up with the response (since we can't accelerate the response to line up with the source). SpectraFoo sets these delays on each analyzer channel, not the actual input channel. So what we're going to do is have the console input sent to one analyzer channel per microphone- that way we can pair each mic with its own console source and a specific delay. Third step: Create a transfer function window setI use a simple window like the one illustrated in the following picture. It lets me see the source and response level (for easy level matching) and the transfer function window.
Back to the task at hand. Let's set up our instrument inputs using the instrument preferences for the Meters and Transfer Function instruments in SpectraFoo: 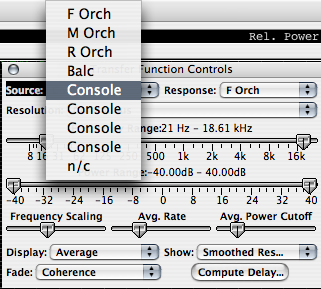 The key here is to select the first microphone and pair it with the first appearance of the console. This defines our first source-response pair- what other analyzers might call a “branch”. Do this for both the transfer function and level meter. Once you've done this, make sure that all your other settings are exactly how you want them- if you don't get it right now, it'll be painful to change later. Two thirds finished! Save your window set, and make sure that you have the Instrument Channel Routing recall on. I recall everything just to be safe. 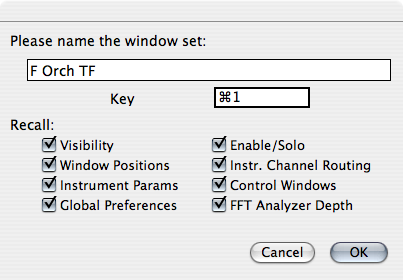 Do it again and again: Duplicate the window set, change the routing and re-save. Here's why: you want to make sure that the window set is “perfect” - we're going to use this as a template to make a window set for every source/response pair. Save the first window set as the name of your next microphone, and give it a logical recall command-key. 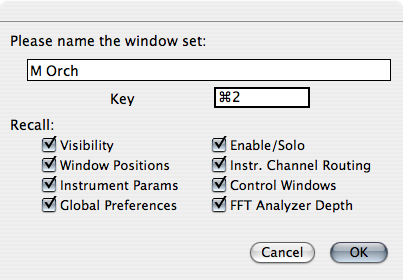 Now change the instrument routings to the second microphone and source pair: 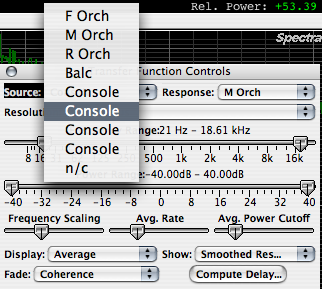 When you're done save the window set and do it again until you have a window set for every pair, remembering to change the response mic and match it with a unique console channel. Once that's done, you're finally ready to measure! The system in useRecall each window set, and find your delay as you normally would. By using the power of window sets, one keystroke will recall your source-response pair and its stored delay, making 'Foo an analyzer with an integrated input switcher . Use this with snapshots and averaging, and you can quickly measure your room without leaving the front of house!Here's how I use this technique: I set my microphones out so that they will let me measure the various speaker systems in several positions, then start finding the delays from one mic to all the speaker systems. Once I've decided which system is my reference “time zero” for the venue, I adjust the delay times for the other speakers to time align them to my reference. I measure the delay times again to confirm that all the speakers are time aligned, and to correct the delays in SpectraFoo's analyzer channels. Then I begin the process of measuring the room, EQing, and wishing that I could hang the speakers in different locations and put acoustic treatments on the walls. I hope you find this to be helpful- it's not difficult and can be a real time saver. The switching concept can also be used for other measurements, making SpectraFoo and a Metric Halo interface the most-cost effective multi-channel measurement system you can find. Optional: Calibrate your system to read in db SPLFirst, set your Level Meters to the "SpectraFoo" scale. Click the Level Meter's Prefs button, then hit "Options…" on the Level Meter Controls pane. Go to the "Scale Type" pop-up menu and selct "SpectraFoo".Here's where the microphone calibrator comes in. Put your microphone in the calibrator, and look at the level- Now, go to the Level Calibration selection in the Analyzer menu, and change the value until the level meter shows the output from your calibrator: 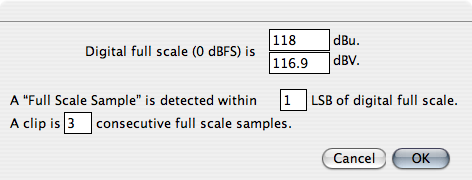 Your meters will now also act as SPL meters for each area you've mic'd! See the meter below:
|
