Tech Note #4: Don’t Fear The Matrix…
By Marc Schonbrun
Revision 1.0 - June 25, 2007
Are you afraid of the MIOConsole Matrix/Routing window? Come on. Be honest. Yeah, I was too.
All that changed when I had the opportunity to sit down and work with a large-format mixing console. Being the “young lad” that I am, I’m more used to DAW routing, which is usually automatic. This console required a bit of work, but man was it flexible. I could send anything anywhere.
The matrix/routing window does the same thing, costs much less than an SSL console and may even be MORE flexible…
When I returned home, I looked at the matrix window with a newfound comprehension; The Matrix window is an extremely flexible way to route audio in a visual way.
This tutorial is going to demystify the Matrix and show you how to use it to its fullest advantage. Yeah, the MIO’s sound great, but that’s not all they do. If you haven’t had a chance to take advantage of the extremely flexible mixer and routings within the MIO – now’s the time.
One Pane: Two Worlds
When you launch MIOConsole and bring up the “Mix/Output Routing” tab (⌘3) you see this window:
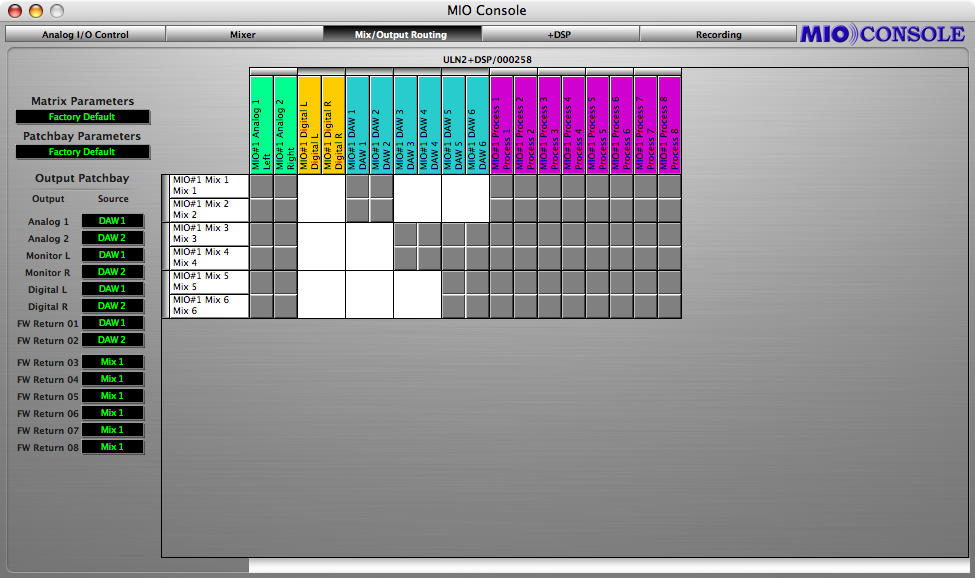
There are actually two very different things going on in this User Interface. Let’s split the interface into two parts.
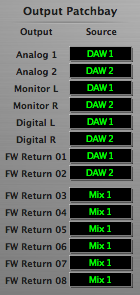
Output Patchbay:
The first element of the UI is the “Output Patchbay”:
(Note, I’m on a ULN-2 – 2882 users will have more outputs listed)
The output patchbay controls the hardware (physical) outputs. It’s set up as a two column grid.
On the left side are your hardware outputs. You can’t change these: these are hardwired. What you can change is what’s fed to them, which you’ll find on the right column.
So it represents a very simple signal flow that goes like this:
Hardware Output ← Source
To some folks this may seem a bit backwards (signal flowing from right to left). Think of it this way: “The output is fed by the source”.
The “source” is easily changed by clicking on the black box with green text to expose a list of available sources. Doing so will give you the following list:
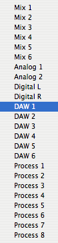
Let’s break down the types of sources:
- Mix 1-6: These are your mix busses inside the MIO, They are controlled from the 2nd pane on the MIOConsole (more on this in the matrix overview). Enable these when you want to listen to an in-the-box mix you’ve created on the MIO (also handy for headphone and foldback mixes).
- Analog 1+2/Digital 1+2: These are your physical inputs. Enable these when you want to direct monitor your inputs through the MIO.
- DAW 1-6: These are the outputs from your DAW or CoreAudio host. DAW 1-6 corresponds to “Outputs 1-6” in your DAW.
- Process 1-8: These are the outputs of +DSP processes. Only engage these if you’ve routed audio in the +DSP window.
Using the output Patchbay you can route any signal you want, any place you want.
Über Cool Tip:
When selecting sources from the popup menu: Hold down the option key to automatically select the stereo source for the output pair. For example: If you want to change Digital 1 + 2 to Mix 1 + 2, select Mix 1 as your output for Digital 1 while holding down option and Mix 2 will automatically be assigned to Digital 2.
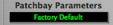
That takes care of the output patch bay. Also note: You can save the state of your Patchbay routing using the “Patchbay Parameters” box and recall them later:
OK. Now that we can route audio throughout the box, we turn our attention to the other side of the interface… The Matrix! (Yes Neo, take the blue pill).
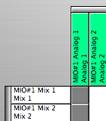
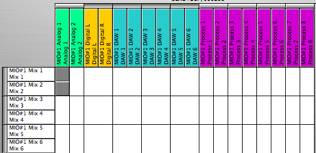
The (Mixer Assign) Matrix:
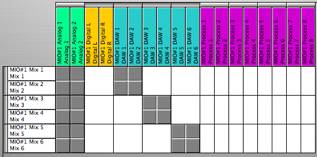
This looks scary, but it isn’t. Across the top you have your different “sources” – which are the exact same sources you were assigning to multiple outputs in the Patchbay…
On the left side are six individual Mix Busses. What’s a Mix bus?
Mix Bus:
A mix bus is simply a summing path for your audio. On the MIO, it’s a full mixer, with individual strips for each channel. Each strip has solo, mute and pan controls. On the ULN-2, you can have up to 3 stereo Mix Busses. Why is this cool? Well, you can have a different headphone mix for the singer on Mix 1+2 and an entirely different mix for the drummer on Mix 3+4, with both stereo mixes being “sourced”from the same input. With the Patchbay, you can assign the mix busses to any physical outputs you choose, including sending copies of the same mix to multiple outputs (this is called multing).
So now we want to make sense of this. The matrix allows you to assign sources to mix busses. It’s done with small grey squares (which you can think of as virtual patch cables or “assign” switches on large-format consoles).
If there is a grey square in your matrix, a source is being assigned to a bus somewhere.
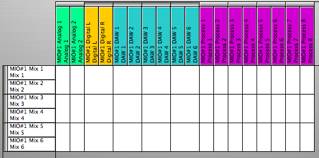
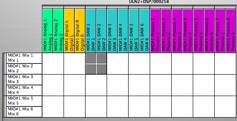
Let’s start with a clean slate. Click in the matrix and get rid of ALL of the grey boxes (you can hold down the mouse and “drag” around to clear things more easily). Make sure it looks like this:
Now, take a second and go to the “Mixer” pane of the MIOConsole (⌘2) and take a look at this:
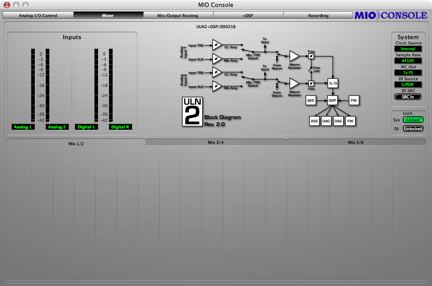
Nothing. Nada. Bubkis.
You have nothing in your Mixer because you haven’t assigned anything in the matrix. That’s the connection you need to make: The Mixer tab gets its orders from the Matrix. Grey Boxes = Virtual Patch Cables.
Now, lets get the Matrix working and patched up.
Whenever a vertical strip (source channel) collides with a horizontal strip (mix bus), you can place a grey box there to route (assign) the source to the mix. Add a grey box to the upper left most corner of your matrix.
We just assigned Analog Input 1 to Mix Bus 1 + 2. Now when you flip back to the Mixer (⌘2), you’ll see a channel there!
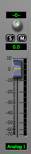
Note: The default state of the Mute control for each channel is to be on — in other words, the channel will be added to the mix, but it will be muted. It is configured this way to keep you from getting a rude surprise, but it also means that you will have to unmute the channel before it can be heard in the mix.
The channel has everything you’d expect: fader, solo/mute and pan. Now go ahead and plug something into Analog 1, put on your headphones and move the fader… Hear that? Right, nothing is happening! You can assign “stuff” to your mix busses till the cows come home, but until you tell your output Patchbay to listen to a mix bus, the audio goes nowhere.
We will come back to that in a second, let’s finish up the matrix. You can go ahead and add as many sources to your mix busses as you feel like. You can add input channels, DAW Returns and Process Returns to any mix bus your choose. Go ahead and mess around with the cause and effect relationship between the matrix and the mix busses.
Presets and Names:
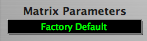
Just as the Output Patchbay supports presets, so does the Matrix. You can save and recall matrix configurations (including the names of channels) through the “Matrix Parameters” dialog box:
As for the channels themselves, it’s often handy to rename the channels from the “factory default” names Metric Halo provides, to personal ones. To do so, all you have to do is double click in the Matrix window on the name of any Mix bus or source channel to display its channel properties:
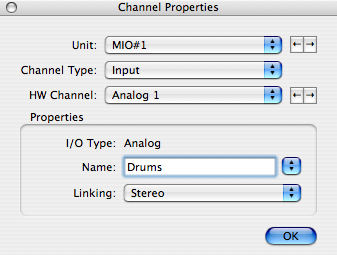
From this window, name the channels or mix busses, as you need to.
Tip: Press Tab to automatically jump to the next, adjacent channel.
Once you’ve renamed your channels, the names will populate all over the MIOConsole, including the Mix busses, +DSP and Record Panel.
Linkage
In the Matrix, you’ll see a row of very thin grey strips directly above or to the side of the channels. These are your “link” buttons, and they allow you to link channels into stereo pairs, or link mix busses into stereo mix busses.
If a link is depressed (active), it forces those channels to group together. Visually, the channels that are grouped have a larger “square” that you can click in. By clicking the link buttons, you can set any channel or mix bus from mono to stereo. In the picture above DAW 1+2 are stereo and Analog 1 is mono. All the Mix Busses are stereo. If we change the mix busses from stereo to mono, the mixer pane will have 6 mono mix busses.
Also: mono channels in a mix bus have pan controls, while stereo channels in a mix bus are hard panned left and right and only contain one fader for both channels.
Creating a Mix:
Now that you’re up to speed, go ahead and assign the channels you want to a mix bus. For simplicity, I recommend that you use iTunes and simply add DAW 1 + 2 to Mix Bus 1 + 2. (Note: DAW 1 + 2 are the default outputs from any CoreAudio app that won’t allow you to select its outputs).
My Matrix looks like this:
And my mixer pane looks like this:
Now that the mixer is set up, we need to go back to the patchbay. In order to hear our mix, we have to tell one of our physical outputs to listen to Mix 1 + 2. This is of course done back at our “Output Patchbay” (⌘3).
I’d like to route this to my monitor outs. So, on Monitor L and R, I select “Mix 1 and Mix 2”. I’m now patched in and changes I make in the mixer tab are finally audible. Go ahead and turn the output down via the fader. For even more fun, make your channels mono (don’t link them) and mess with the balance of iTunes tracks…
Mix Bus Presets
The final step is being able to recall your channel settings within the mix bus itself.
This includes the state of any fader positions, pan, mute and solo. To bring up the presets menu, click and hold down on the name of the Mix Bus (in the Mix Pane – ⌘2). Doing so will bring up the following popup menu:
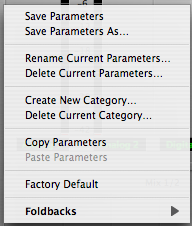
You can use this menu to save mix presets, recall presets that you have previously created and copy mixer settings from one mixer to another.
Things You Can Do with MIO Routing:
Now that you see how painless this all is, you can start to do a whole bunch of stuff with the mixers. Here is a small list of what you can do:
- Foldback mixes
- Talkback mixes
- Implement Summing in the MIO using its superior (to just about anything) 80-bit mixer
- Independent monitor mixes
- Send and receive effect mixes
- Use +DSP effects live (for sound reinforcement)
- Use +DSP effects live (as printed effects during recording)
With the advent of process returns, you can now route the outputs of a a mix bus back to the DAW for recording. This means you can do a full mix within the MIO and feed it back to the DAW (or Record Panel) for final bouncing.
Revision History:
- Revision 1.0 - June 25, 2007 - Initial Release
|